Announcement

Collapse
No announcement yet.

[Guide] How to use your Black Mara (PVE - Raid)

Collapse
This is a sticky topic.
X
X
 
  • Filter
  • Time
  • Show
Clear All
new posts

  • [Guide] How to use your Black Mara (PVE - Raid)

    [Intended for reading in DN Dark style]
    This brief guide will cover Black Mara's game play in Rune Dragon Nest. The purpose of this guide is to educate aspiring Black Mara players to achieve it's full potential as a damage contributor in Rune Dragon Nest.
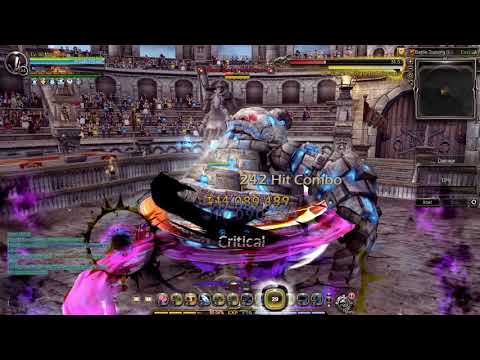
    The author is a Black Mara player who has achieved the following DPS in Rune Dragon Hardcore:

    Click image for larger version  Name:	412mDPS_Snip.JPG Views:	2 Size:	13.3 KB ID:	93750
    ​I believe that's all the credibility I need.


    *Use CTRL+F and search [...] for a quick jump to desired section. Eg. Introduction to Black Mara [IBM], CTRL+F, key in "IBM", and press Enter.

    Table of contents:
    1) Introduction to Black Mara [IBM]
    2) Skill descriptions and comparisons [SDC]
    3) Skill build, plates, additional skills [SPA]
    4) Skill usage [SKU]
    4.1) Key combos
    4.2) Special skills
    4.3) Special windows
    5) Bubble management [BMGT]
    6) Party synergy [PTSG]
    7) Credits [CDTS]
    8) Frequently Asked Questions [FAQ]


    1. INTRODUCTION TO BLACK MARA [IBM]

    Why make a Black Mara? She's clearly an emo character because people don't create enough Black Maras, duh.
    It can be a pain to learn how different skills are used, but it is very rewarding when you can control it well. This guide will help you shorten the time required to reach that point.

    For team players, you can do your part as a Black Mara by producing more DPS with the same gears than you would on any other Sorceress class. Maximum value for gold!
    For solo egoistic players, you can achieve the best DPS produced by a single class. With 2 debuff skills, i-frame skills & self HP regeneration, you are perfectly set for solo styles as well!

    What? Why aren't there as many Black Maras as you would expect to see then?
    Many reasons, but the biggest reason is that people don't like to step outside their comfort zone. Don't be one of them.


    2. SKILL DESCRIPTIONS AND COMPARISON [SDC]


    So you got a whole list of skills. Here's a quick introduction and cheat sheet for understanding your main skills;

    1. Click image for larger versionName:	VoidCoil.JPGViews:	2Size:	1.7 KBID:	93703
    Void Coil - Strongest individual skill. Used in both normal and transformed mode. Skill included in Contract combo.

    2. Click image for larger versionName:	Ripping.JPGViews:	2Size:	1.7 KBID:	93704
    Ripping - Required to start Contract combo (Class Mastery I), which is the strongest chain of skills you can use.

    3. Click image for larger versionName:	Cleaving.JPGViews:	1Size:	1.6 KBID:	93705
    Cleaving - Strong skill with long cast time. Usually used in normal form only. Skill is included in Contract combo.

    4. Click image for larger versionName:	BlackStrike.JPGViews:	1Size:	1.7 KBID:	93706
    Black Strike - Strong skill when transformed. Not recommended for beginners.

    5. Click image for larger versionName:	SmokeStorm.JPGViews:	1Size:	1.7 KBID:	93707
    Smoke Storm - When in normal form, usually used for bubble management (see Bubble Management section [BMGT] for more details). When transformed: Strong skill, long cast time. Can blink (tumble) out of skill, can cancel skill cast by using any other skill.
    Cheat sheet
    Click image for larger version  Name:	CheatSheetRevised.JPG Views:	1 Size:	47.5 KB ID:	93828
    *Main skills' CD are reset upon transformation, so it is better to be looking at DPS/Cast and arrange your skills accordingly.


    We will also be looking at important skills for generic skill rotation:

    6. Click image for larger versionName:	Entomb.JPGViews:	2Size:	1.7 KBID:	93708
    Entomb - Used for enhancing damage during burst windows. Used best with Void Coil and Contract combo. More details under special skills section.


    7. Click image for larger versionName:	Insult.JPGViews:	2Size:	1.7 KBID:	93709
    Insult - Main skill for gaining Contracts. Can only be used in air, or chained from using Wheeling Staff (Class Mastery III). Can be cancelled in mid-air with Air Blink/Turbulence. More details under special skills section.
    900% *13 hits maximum, total skill damage 11,700%.
    Class Mastery III boost to add 4 hits. Total skill damage 11,700% -> 15,300%


    8. Click image for larger versionName:	ContractFiller.pngViews:	1Size:	58.0 KBID:	93710
    Fillers for gaining Contracts.
    Ebony Spark - 1~3 hits. Skill damage 300% per hit. Long range.
    Haze - 1 hit, +1 hit with left click. Skill damage 2860% per hit. Can be used for mobility due to short CD.
    Turbulence - 2 hits. Skill damage 5430%. Used for cancelling skills, and positioning for Insult.


    9. Click image for larger versionName:	BlackMara.JPGViews:	2Size:	1.7 KBID:	93713
    Black Mara - Transformation skill. Consumes 11 Energy (bubbles), skill damage 7900%. Forward transformation can link to Ebony Spark. Holding back key while transforming will create big AOE, useful for Dragon stage 25% (30 monster kills).


    10. Click image for larger versionName:	Inhale.JPGViews:	1Size:	1.7 KBID:	93711
    Inhale - Reverting skill. Long CD, reduces by 5 seconds per main skill that hits (Class Mastery II). Skill damage 6400%.


    Additional utility skills:


    11. Click image for larger versionName:	WraithForm.JPGViews:	2Size:	1.6 KBID:	93712
    Wraith Form - Invulnerable for 3 seconds. Can cancel by use of any skill. Recovers a total of 9 seconds CD off all skills, and 15% HP.


    12. Click image for larger versionName:	Ulti.JPGViews:	1Size:	1.8 KBID:	93714
    Deadly Smoke - Used for i-frame purposes only. Skill damage 8100%. More details in special skills section.


    13. Click image for larger versionName:	BuffDebuff.pngViews:	1Size:	61.9 KBID:	93715
    Buffs and debuff skill
    Mana Flow - 10% CD reduction for all members who receive the buff. Please be considerate and always rebuff your members (and yourself) often.
    Complete Darkness - Self buff, 20% Dark elemental attack. Important. Do not forget.
    Meaningless- 20% elemental resistance reduction debuff. Important, but leave it to other classes such as Adept or Physician whenever possible.

    Last edited by Seraphimu; 10-04-2017, 07:13 PM.
    才能は開花させるもの
    センスは磨くもの
    Seraphimu・RillaRooMaraphimuTaliceGrayKarifene

  • #2
    3. SKILL BUILD, PLATES, ADDITIONAL SKILLS [SPA]
    Skill build
    Click image for larger version  Name:	SkillBuild.JPG Views:	1 Size:	84.1 KB ID:	93719


    Skill plates


    Possible plates to select based on skill data given above:

    1) Void Coil DMG +20%
    Skill is in top ranks of skill data in both normal and transformed mode. Contributes to Contract combo as well.

    2) Insult DMG +20% or CD -20% (15 seconds -> 12 seconds)
    Skill damage is good, but due to being main Contract gain skill, CD is preferred.

    3) Inhale CD -20% (40 seconds -> 32 seconds)
    Exhaling out as soon as possible to preserve bubbles is advised.

    4) Ripping CD -20% (6 seconds -> 4.8 seconds)
    Ripping controls the start of Contract combo. CD advised for more flexibility, especially for beginners. DMG option is rejected due to low skill damage.


    Additional skill plates:

    5) Entomb CD -20% (35 seconds -> 28 seconds)
    Entomb can always be cast off CD, therefore lower CD is preferred to decrease skill downtime.

    6) Black Strike DMG +20%
    Worth using if it is included in your transformed mode combo due to high skill damage for its cast time. CD is rejected due to low skill damage in normal form, and skills CD are reset upon transformation.

    7) Black Mara DMG +20%
    Black Mara usually shows up within top few skills on Damage Meter readings, if rotation is done properly. AOE can be used for Rune Dragon Nest 25% HP (30 Monster kill stage).

    8) Haze/Ebony CD -20% (6 seconds -> 4.8 seconds)
    Filler skills to gain Contract. Can be used if inexperienced with usage of Insult. DMG option is rejected due to low skill damage.

    9) Wraith Form CD -20% (40 seconds -> 32 seconds)

    Some people may prefer this as they use Wraith Form very often. May come in handy when using Barnac Skill Heraldry.

    10) Shadow Shell CD -20% (30 seconds -> 24 seconds)
    Great for beginners. Shadow Shell reduces damage intake by 40%, increases super armor by 50%. Getting a CD plate will help reduce the downtime.
    Skill +1


    Ways to attain +1 skills are from Cash shop Skill Heraldry +1, Cash weapon costume (Main), and skill accessories from Blacksmith Merlin.

    1. Cash shop skill heraldry
    Recommended to add +1 Void Coil. It will increase generic skill rotation damage, and Contract combo damage consequently.

    2. Cash weapon costume (Main hand)
    +1 to Ripping. Not as if you have a choice, nut bread.

    3. Skill accessories
    While I recommend going for Genesis accessories, some of you may face financial difficulty or simply have no interest in them, so skill accessories are probably the next best possible choices.
    Note that Mara skill accessories are only available from level 93 onwards. You may opt for Tough Rose Red Necklace if you already have them from before.

    Necklace - Black Strike +1, because no other choices are available.
    Earring - Void Coil +1, add a +1 on top of your cash heraldry for an additional 7% skill damage.
    Ring - Cleaving, Black Mara. Ripping rejected due to low skill damage.

    4. SKILL USAGE [SKU]
    What's the point of learning everything without being able to use it in Raids?

    4.1 Key combos
    Learn these basic combos, and you'll be using them from 1/2 > 3 > 4 > repeat.

    Combo 1: Bubble gain
    Smoke Storm (optional) > Void Coil > Cleaving (optional)


    This combo allows for the most bubble gain per cast time. Smoke Storm should only be used when boss is guaranteed to be stationary for the next 10 seconds. Cleaving requires full charge, use only when necessary. Void Coil is the primary choice due to its flexibility.


    Combo 2: Quick bubble gain (last resort) *Use in sets of 2 contracts or not at all
    Ripping > Hold left click > Smoke Storm (optional)


    This combo is to be used only when bubble count drops below 35~40. Should only be used when Contract skills are available to replenish Contract lost from this combo. Sets of 2 Contract required because the 2nd Contract is Cleaving, which gives more bubbles.


    Combo 3: DPS initiation (start of window)
    Entomb > Turbulence > Insult > Black Mara > Ebony Spark > Black Strike (optional) > Void Coil > Ripping > Hold left click


    This combo is the most common and efficient way to start a window. You can cast Entomb beforehand, and use Turbulence cut the cast time of Entomb or to avoid a stomp while positioning for Insult. The rest is self explanatory. Using Key skills such as Void Coil and Black Strike first helps to CD Inhale, which you will need if the window ends abruptly. Skills picked have the highest damage/cast times, therefore it should also be the most efficient to use.


    Combo 4: Fluid revert with Contract gain
    Turbulence > Exhale


    This is to allow you to cancel whatever you are doing while gaining 1~2 Contracts for Combo 2. Exhale is reverting to normal form to keep your bubble count up, to reduce the interval for the next transform.


    An example of what a basic rotation looks like:


    Full playlist here


    4.2 Special Skills

    Click image for larger version  Name:	BlackMara.JPG Views:	2 Size:	1.7 KB ID:	93720
    Black Mara cancels other skill animations. Forward transformation can link to Ebony Spark by just using left click.

    Click image for larger version  Name:	WraithForm.JPG Views:	2 Size:	1.6 KB ID:	93721
    Wraith Form cancels other skill animations. Moves forward automatically.

    Click image for larger version  Name:	VoidCoil.JPG Views:	2 Size:	1.7 KB ID:	93722
    Void Coil can be cancelled by using any other skill.

    Click image for larger version  Name:	Ripping.JPG Views:	2 Size:	1.7 KB ID:	93723
    Ripping can be used in air. Be careful not to accidentally use it in the air when starting Contract. Contract skills cannot be used in mid-air.

    Click image for larger version  Name:	Turbulence.JPG Views:	1 Size:	1.7 KB ID:	93724
    Turbulence can cancel Insult if done poorly. Be cautious.

    Click image for larger version  Name:	Insult.JPG Views:	2 Size:	1.7 KB ID:	93725
    Insult - Aim to have the target at 1-2 o'clock for high hit count. Class Mastery III (Wheeling Staff > Insult) does not require this.

    Click image for larger version  Name:	Entomb.JPG Views:	2 Size:	1.7 KB ID:	93726
    Entomb contributes 350% per projectile when main skills are used. Projectiles have homing ability.

    Click image for larger version

Name:	Ulti.JPG
Views:	9152
Size:	1.8 KB
ID:	94114
    Deadly Smoke used for i-frame purposes only. I-frame duration 4.7 seconds. Can only be cancelled mid-cast by use of Blink, Turbulence, Wraith Form, Black Mara. Can be used with Wraith Form consecutively for extended period of i-frame to avoid skills such as Suction-Explosion attack at dragon stage.


    .
    SKILL NAME PROJECTILES
    Ripping 2
    Cleaving 2
    Void Coil 8
    Black Strike 2
    Smoke Storm 2
    Deadly Smoke 16
    [Contract] Void Coil 2
    [Contract] Cleaving 2


    4.3 Special windows
    Take note of these windows. You will be using Wraith Form here to keep your attacks continuous.

    Stage 1 - Cerberus
    HP triggered fire breath -

    1) Use up as many Contracts while transformed and use Combo 4 to move out of the stomp AOE.
    2) Charge up bubbles from afar with Combo 1. Move near, cast Smoke Storm and use Wraith Form to avoid the stomp AOE again. This helps prepare your Smoke Storm for the next rotation, and keeps you in close range of the boss.
    3) Combo 3


    Suction towards boss with explosion -
    Use Deadly Smoke to avoid damage and deal 8100% + 5600% if Entomb is active.

    Stage 2 - Knight
    HP triggered knock back (power of darkness out of control) -

    1) Use up as many Contracts while transformed, use Class Mastery III (Wheeling Staff > Insult) > Exhale right before you get hit by knock back.
    2) Use Wraith Form to move towards boss without delay, and to CD Insult. Can use Combo 2 to prepare bubbles, use Insult to gain Contracts before A+D knock back.
    3) Combo 3 after escaping A+D.


    Stage 3 - Anubis
    Pizza mechanic to Tornado sequence -
    1) Charge up bubbles during Pizza with Combo 1.
    2) Use up as many Contracts while transformed, use Class Mastery III (Wheeling Staff > Insult) > Exhale to move out of tornado AOE.
    3) Use Wraith Form to move through Tornado to avoid buff clear and CD Insult.
    4) Can use Combo 2 if necessary, followed by Combo 3.


    Stage 4 - Rune Dragon
    HP triggered Rune Sign -

    1) Use up as many contracts while transformed, use Turbulence > Insult (if available) > Exhale to avoid wasting bubbles while escaping A+D bind.
    2) Combo 1 or 2 > Combo 3
    3) Use Wraith Form to cancel skill animation and move safely through the marked lines


    HP triggered Rune Prison -
    1) Use up as many Contracts while transformed, use Turbulence > Insult (if available) > Exhale to avoid wasting bubbles during the knock back. Can use Wraith Form to negate knock back animation if there is a need to CD Insult.
    2) Combo 3 until last few openings, use Combo 4 to revert to avoid wasting bubbles.
    3) Exit Rune Prison, charge bubbles with Combo 1.
    4) Combo 3 after Rune Prison inner explosion is finished.

    5. BUBBLE MANAGEMENT [BMGT]

    You need to manage your bubbles. Unlike transformed skills, normal skills do not reset CD. The idea is to stay in Black Mara form for as long as possible.
    Why?
    Top skills are all in transformed mode, though Contract combo is limited by Insult/Haze/Ebony CD, the other skills are not limited to CD if you can re-transform. To do this, we keep our bubble count at 35~40 before using Exhale, so that it is easy to hit 50~60 without wasting Contracts in normal form. Aside from Smoke Storm in normal form, no other skill can keep up with transformed skills DPS/cast.

    List of skills in normal form and number of hits:
    Skill name Number of hits
    Ripping 3 (Fast)
    Void Coil 5~12 (Can be cancelled)
    Cleaving 4-9 (Depends on charged stage)
    Smoke Storm 14 (Slow)
    Black Strike 5
    [Contract] Void Coil 3
    [Contract] Cleaving 7
    .
    With bubbles at 35~40, reaching 50 is easy with a full Void Coil and Ripping, followed by Smoke Storm to keep the bubble count. The lower your bubbles end up, the more skills you need to use in order to transform again. If it does drop below 30, I recommend using Contracts to quickly transform. Even if you have no Contracts to use, you will have your basic skills available (Void Coil, Black Strike, Smoke Storm, Cleaving) as their CD resets with every transform.
    Last edited by Seraphimu; 10-04-2017, 08:09 PM.
    才能は開花させるもの
    センスは磨くもの
    Seraphimu・RillaRooMaraphimuTaliceGrayKarifene

    Comment


    • #3
      6. PARTY SYNERGY [PTSG]

      Black Mara is built for overwhelming DPS, and that is the role she takes on in a party.


      To maximize Black Mara's DPS, it is recommended to have as many of the following:

      1) Lancea's Harmonize - This helps to release more skills within short windows, increasing DPS significantly.
      2) Warrior's Breaking Point - 10% attack helps everyone, but Black Mara has no additional attack % from skills, unlike other classes such as Archer, making her less prone to suffering from any diminishing returns.
      3) Physician's Magma Punch, Sacrifice - Magma Punch will provide -20% elemental resistance reduction, allowing Black Mara to focus on damage dealing. Sacrifice 10%'s contribution is similar to Warrior's Breaking Point.
      4)Elestra's Mana Flow, Ice stacking - Having another Mana Flow user will save the Black Mara the trouble of spending time to rebuff, again focusing on damage dealing. Ice stacking will help provide another 20% additional damage to the already overwhelming DPS.
      5)Soul Eater's Curse - Having a stackable -15% elemental resistance reduction will help enhance Black Mara's damage even further.
      6)Assassin's Raid - This gives 15% more damage on critical hits, enhancing Black Mara's damage even further.
      7) Archer's Rage of the Owl - This gives 10% more critical damage, self explanatory. Bowmasters also provide bullseye, though Black Mara's debuff duration should be sufficient.

      Lancea can be filled with Flurry for more DPS contribution.
      Warrior can be filled by Destroyer, to fulfill the role of tank.
      Assassin can be filled with a Light Fury, paired with a Physician for heals.
      Archer can be filled with Artillery, for more DPS contribution, especially with the upcoming skill revamp. They will be able to capitalize on Mana Flow and Harmonize as well.


      7. CREDITS [CDTS]

      This concludes the brief guide for Black Mara in Rune Dragon Nest. I would like to thank Xenocho for providing skill cast time information, iuhgnehz for in-depth discussions, and the rest of my raid team(s) that helped me explore Black Mara's potential, without whom I would not have been able to write this guide.
      Special thanks to the new forum as well, without which I could have finished a few hours earlier.


      Also, I would never have thought of writing this up had it not been for the people pestering me about Black Mara questions.

      8. FREQUENTLY ASKED QUESTIONS [FAQ]


      Q: Why Blek Mara not Blek?
      A:

      Q: Why use Dark DN style?
      A: It's easier on the eyes

      Q: Why don't you use double transformation method?
      A: A single transformation consumes 11 bubbles, for 7900% damage. This can be easily made up for, but losing 11 bubbles will mean a longer interval to the next transformation. Refer to Bubble management [BMGT]


      Q: Some people don't rotate their skills, and prefer to let the transformation end normally (out of bubbles) before using Contracts to charge up again. Which is better?
      A: Define better. It's easier to do the above, but less efficient in the long run, you'll have to use a lot of Contracts to hit 50 bubbles - not something you should be doing if you want to be doing more DPS.

      Last edited by Seraphimu; 10-04-2017, 07:24 PM.
      才能は開花させるもの
      センスは磨くもの
      Seraphimu・RillaRooMaraphimuTaliceGrayKarifene

      Comment


      • #4
        I find that most mara players currently are at a loss on what to do in terms of maximizing the class' DPS so this will be rather handy to most of us.


        Thanks for sharing a much needed guide; very informative ~

        Comment


        • #5
          Great guide, i urge players to read up this guide, from the way it is now, majority of the mara players are playing it incorrectly, or not to her full potential. hope they can pick up a thing or two from this.
          Last edited by Chelly; 10-02-2017, 06:08 PM.

          They appeared, gleaming and victorious. Our Emperors, breathless, bathed you in savior's silk. Then came the sound. Across all our worlds,the ceremonial Naga drums. Ten solemn beats to declare the suffering was over. With each beat terror began to crush my throat. They were not stoic and silent. I tried to call out but only a strangled whisper escaped.
          When the ninth beat rang a torrent of blood filled the stadium, loosed by divine blades.The drums,the Empire, fell silent forever.

          Comment


          • #6
            This is so timely as I was leveling my Black Mara last weekend (still not max tho) and thinking of giving it a try on nests. Will be very useful. Thank you!

            Comment


            • #7
              thanks for the detailed guide, this is very useful to me now i can optimise the potential damage of my mara.
              ~Severalle | Zachura | Syliveth~
              LINElife

              Comment


              • #8
                Great guide. thanks for this.
                When do you think is a good time to make use of Whirling Staff CM3?

                Comment


                • Zeref
                  Zeref commented
                  Editing a comment
                  imo the cast time is too long and is mostly just worth using right before a boss spawns ~

              • #9
                Originally posted by athlos View Post
                Great guide. thanks for this.
                When do you think is a good time to make use of Whirling Staff CM3?
                You're welcome.

                I assume this is not using just Wheeling Staff, but the linked Insult as well for more concentrated hits. I would not advise anybody to use Wheeling Staff on its own.

                First, let us acknowledge some facts.
                1) You can hold up to a maximum of 10 Contracts
                2) The alternative is to use Turbulence > Insult, which is usually followed up with Black Mara > Ebony Spark
                3) Turbulence has 1-2 hits, Insult has 13, and Ebony Spark has 1~3.

                I would say to use CM3 Insult based on the boss size. On bigger bosses, one would hardly face any aiming issues. Therefore Turbulence > Insult, Ebony Spark will most likely net 10 or more Contracts.
                If you are unable to land more than 5-6 hits Insult, I would suggest for you to use CM3. This problem is common when fighting against smaller sized bosses in Rune Dragon Nest (Knight, Anubis).
                If, however, you are able to land sufficient hits on Insult without CM3, I will suggest for you to continue to do so.

                才能は開花させるもの
                センスは磨くもの
                Seraphimu・RillaRooMaraphimuTaliceGrayKarifene

                Comment


                • athlos
                  athlos commented
                  Editing a comment
                  Good point. Thanks for explaining.
                  Looking forward to more videos

                • Arkhaez
                  Arkhaez commented
                  Editing a comment
                  "I would not advise anybody to use Wheeling Staff on its own."

                  So is it okay to leave Wheeling Staff only at level 6?

                • Seraphimu
                  Seraphimu commented
                  Editing a comment
                  Yes, it's okay.. but it's the only skill you will use from the Sorceress tree, aside from Mana Flow. You need to hit the 45 SP requirement, so I think dumping the points into Wheeling Staff would be more efficient. If you do PVP, you can add Poison Missile instead perhaps

              • #10
                I'm using Shadow Shell CD and it gives you almost permanent Shadow Shell buff. A bit useful survivability wise. (I tanked some stomps in RuDN HC thanks to it) and replaced my Inhale CD plate since "main skills" recovers the cool down of it. Just my two cents

                Anyway, nice guide. I hope people will actually read this.


                • Máriudeth • Tincxz • Siegurth • Svanhldir • Tinlxz •
                • Saint • Majesty • Black Mara • Saint • Elestra •
                Discord: Siegurth#4651 | Perfect Guild is recruiting! Click here for details!


                Comment


                • #11
                  Originally posted by Siegurth View Post
                  I'm using Shadow Shell CD and it gives you almost permanent Shadow Shell buff. A bit useful survivability wise. (I tanked some stomps in RuDN HC thanks to it) and replaced my Inhale CD plate since "main skills" recovers the cool down of it. Just my two cents

                  Anyway, nice guide. I hope people will actually read this.
                  Your perspective is welcome.
                  I completely overlooked Shadow Shell. I will add to recommend it to beginners.
                  Thanks for your input, hopefully with more contributions the guide will serve its purpose
                  才能は開花させるもの
                  センスは磨くもの
                  Seraphimu・RillaRooMaraphimuTaliceGrayKarifene

                  Comment


                  • #12
                    Originally posted by Seraphimu View Post

                    Your perspective is welcome.
                    I completely overlooked Shadow Shell. I will add to recommend it to beginners.
                    Thanks for your input, hopefully with more contributions the guide will serve its purpose
                    Glad to help~ Also noting that getting an Insult CD plate makes the Insult skill CD synchronize with the wheeling staff CD CM3, so it's a must have plate. Although I'm kinda meh about CM3, using it is very situational, I seldom use it esp on mobile bosses like in S1 doggo and S2 boss Hruniblehbleh (except during ADAD mech), so I use wheeling staff as a filler skill instead (lul), wrong timing of usage, goodbye contracts lmao. Even with large targets from my experience, the hitbox is so smol, sometimes it doesn't hit the target not even once gdi

                    OT: the emotes here are so fugly


                    • Máriudeth • Tincxz • Siegurth • Svanhldir • Tinlxz •
                    • Saint • Majesty • Black Mara • Saint • Elestra •
                    Discord: Siegurth#4651 | Perfect Guild is recruiting! Click here for details!


                    Comment


                    • #13
                      been waiting for this........... thanks for sharing!!
                      0togiri (Physician) Otogiri (Adept) AestouFalx (Flurry) Aestou (Saleana)

                      Comment


                      • #14
                        Why are Black Mara's rare? those who played Persona 3 knows one reason why )
                        "Behind every mask lies a man who can't live in his own sins..."

                        Comment


                        • #15
                          Im waiting for this.. thanks for the guide.

                          Comment

                          Working...
                          X